Oil pastels verses crayons
- ArtfulMommy
- Mar 18, 2019
- 4 min read
Updated: Jul 19, 2023

Have you ever wondered what the difference between oil pastels and crayons are? Is one better than the other? They are both excellent materials to have in your art space. Read on and I will explain the differences and give you some ideas on how to use them in process based art activities for children!

As you can see from this example, the most obvious difference between crayons and oil pastels is color saturation. Your crayons will never be as bright as oil pastels.
Crayons
Most crayons are made out of paraffin wax (a petroleum based product) and pigment. They also now make soy crayons. Soy crayons are made out of soy oil and pigment. The soy oil comes from soybeans, so it is better for the environment than typical paraffin wax crayons. Beyond being better for the environment, soy crayons are smoother than typical crayons. Smoothness typically means your kids won't have to press as hard on the paper. A frustrating drawback to soy crayons is they break much easier than typical wax crayons.
I love having crayons handy for drawing and sketching on paper. Crayons are small and fit perfectly into the hands of toddlers. I've also used them with teenagers when doing quick sketches. When you give a crayon to a child over the age of ten it takes the pressure off. So go ahead, give crayons to teenagers!

Crayons are a great, quick, cheap art material, but they are generally not good for mixing colors. With crayons you basically get one color at a time. You can try to blend, but it takes a lot of going back and forth between colors and a lot of pressure, something small kids don't do very well.
Oil Pastels
Oil pastels are definitely a step up from crayons. There are two main difference between oil pastels and crayons. You can blend oil pastels, and they are much more saturated in color.
Oil pastels are made from a pigment mixed with a non-drying oil and wax binder. They come in three different grades, scholastic, student or professional. Scholastic will be the cheapest. The more you spend on your oil pastels the softer they will be. The softer they are the better they will be for blending. Student grade oil pastels are not terribly expensive. This set of Sakura Cray-Pas oil pastels is a great starting out set. If you are teaching a classroom full of kids you may find that you run out of certain colors. I always ran out of white, red and black, so I would buy separate boxes of just those colors. You can buy single boxes of same color oil pastels from art stores such as Dickblick.com.
You can use oil pastels on just about anything: paper, cardboard, masonite board, canvas, and wood.
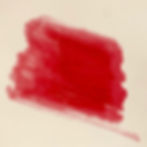
You can use various oils and solvents with oil pastels. Most solvents are toxic, so when working with children I always stick to using baby oil. You can apply it with a q-tip, brush or cotton ball. You can see here how I create an almost watercolor effect by adding baby oil to my red oil pastel.

There are many different ways you can blend your pastels. Blending with oil pastels can end up looking very much like paint. My favorite way to blend oil pastels is to first put down a light amount of one color (leaving some white paper showing through), then go over it with another color. In my example I put down some red, then I went over it with yellow. I could then go over the yellow again with more red or add some baby oil to create and even better blend.
I also love blending with white. This means I put down one or two colors, then go over them with white. It will create a lighter value and a more blended look.
You can blend colors just using your fingers and rubbing the color on the paper.

You can also blend colors by doing stippling. Lots of little dots like the artist Georges Seurat.

Scumbling is another way to blend using oil pastels. Here you are basically building layers, often using little circular motions.

Cross-hatching is another technique for blending oil pastels. Cross-hatching means creating lines using different colors that cross over each other to create a new color.

For something fun and a little different give kids a piece of black or colored paper and let them use oil pastels on it.

Another fun technique that you can do with oil pastels is sgraffito. Put down various oil pastel colors in random abstract patterns. Next go over it with black oil pastel. Make sure to put down a thick layer. Then take a sharp tool like a paper clip and scrape into it to make a design.
Something to keep in mind when working with oil pastels is the fact that they can get a little messy. Remind kids to pick up pieces that drop onto the floor before they step on them and smush them into the carpet!
Oil pastels will get dirty, you will need to show kids how to take a paper towel and wipe off the tip if they want to keep their colors pure. Also remind kids to keep the paper on the pastels, this will help keep them clean as well.
One of my favorite projects to do with oil pastels is landscape painting. All you need are some oil pastels in a cup, a paper towel, a small sheet of cardboard and optional is some baby oil. Have students create a viewfinder with their fingers, find a view that they like, then draw it. Remind kids to blend and mix their colors. I can always tell the difference between a beginning artist and an advanced artist by the amount of blending they do. Allowing young children to play with pastels and blend colors at an early age will set them up for being able to create more advanced colors in realistic works of art in their future!
How about you? What do you prefer, oil pastels or crayons and why?